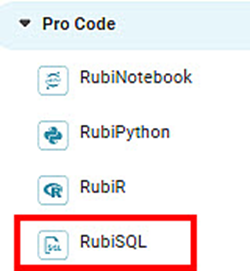
RubiSQL is a feature within Code Fusion that helps write code in SQL to modify the values in your database. It also allows you to delete values in your database.
You can use the RubiSQL node as a stand-alone node or connect it to the Reader node (dataset) or other algorithm nodes. You can connect multiple predecessors or preceding tasks to a single RubiSQL node.
To use RubiSQL, follow the steps given below.
- Create your algorithm flow. Refer to Building Algorithm Flow in a Workbook Canvas.
- Drag and drop RubiSQL on your workbook canvas.
If required, connect other nodes to RubiSQL in your algorithm flow.
Note:
You can connect multiple predecessors to RubiSQL.
- Select the RubiSQL.
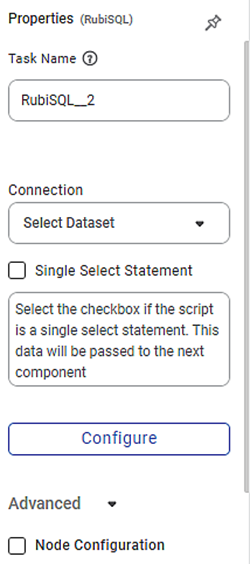
The available properties of RubiSQL are as shown in the figure given below.
The table given below describes the different fields present on the Properties pane of RubiSQL.
Field
Description
Remark
Task Name
It is the name of the task selected on the workbook canvas.
You can click the text field to edit or modify the name of the task as required.
Connection
It allows you to select the SQL database.
You can select a connection from the list of available ODBC connections (PostgreSQL, SQL, MySQL, Oracle, and ODBC).
Single Select Statement
It allows you to decide whether the RubiSQL data is to be passed to the successor node or not.
Select this checkbox only if your RubiSQL code is a Single Select Statement.
Configure It allows you to enter SQL code. — Advanced
Node Configuration
It allows you to select the instance of the AWS server to provide control on the execution of a task in a workbook or workflow.
For more details, refer to Worker Node Configuration.
- In the Properties pane, click Configure.
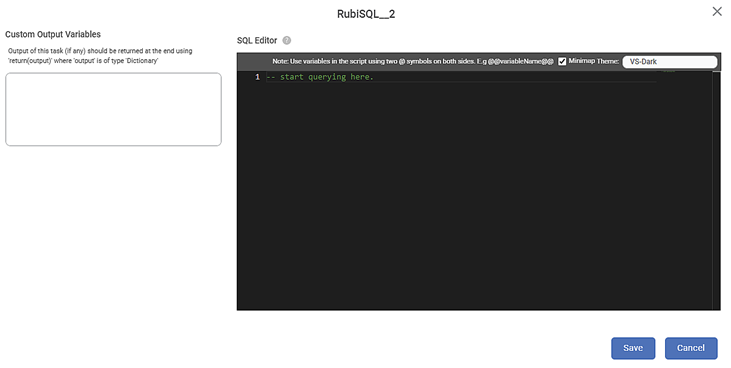
The RubiSQL configuration page is displayed.
The fields/icons on the RubiSQL configuration page are described in the table below.
Icon/Field
Description
Custom Output Variables
It displays a list of output variables created by you. These variables are stored in the form of a Dictionary.
Note: This field is available only if the Single Select Statement checkbox is selected.
SQL Editor
The SQL Editor helps you to add your SQL statements. Refer to Using SQL Editor.
TRAINING REQUIRED
Functionality is coming soon.
Minimap - It is a small, scaled version of code editor window.
- If selected, shows the overview of entire code area in top right corner of code editor window.
Theme - It helps you to customize the code editor theme.
- Following theme options are provided:
- VS-Dark
- VS-Light
- High Contrast-Dark
- High Contrast-Light
It helps you to maximize the Code Editor page.
It saves the changes and closes the configuration page, and returns you to the workbook canvas.
It cancels the changes and closes the configuration page.
- Enter the SQL code in the SQL Editor. Refer to Using SQL Editor.
Click Save.
The RubiSQL code is saved.
Note:
If your SQL code has only one Select statement, select the Single Select Statement checkbox on the Properties pane. It allows you to pass the result of the Select statement to the successor node.
Run the algorithm flow for the RubiSQL Refer to Running a Workbook.
The RubiSQL code is executed.
Notes: |
|
Using SQL Editor
In the SQL Editor, you can add your SQL statements to add/update/delete data from the selected dataset.
Some standard guidelines to add SQL statements are given below.
- While writing the name of the database, ignore the preceding SQL For example, if the Connection is SQL.dbo.employeeregion$, use the name as dbo.employeeregion$.
- You can use variables declared at the workbook/workflow level. Refer to Using Variables in RubiSQL.
A sample RubiSQL code is shown in the figure below.
The table below explains the above code snippet.
Line of Code | Interpretation |
| SQL statement to delete all the rows from the |
| SQL statement to select all the rows from the database |
Using Variables in RubiSQL
The variables defined at the workbook/workflow level can be used in the RubiSQL custom component.
To use a user-defined variable in RubiSQL, follow the steps given below.
- Create your algorithm flow. Refer to Building Algorithm Flow in a Workbook Canvas.
- Drag and drop RubiSQL on your workbook canvas.
- If required, connect other nodes to the custom component in your algorithm flow.
- Select RubiSQL and in the Properties pane, click Configure.
The configuration page is displayed. - Enter the SQL statements in the code editor, as required.
- To use a workbook/workflow level variable in the statements, use @@ symbols before and after the variable name.
For example, if the variable name is var1, you can use it in RubiSQL as @@var1@@.
A sample RubiSQL code containing a user-defined variable is shown in the figure below.
In the above code,demodb.iris_mysql– Name of the databasePetalWidthCm– Name of a column in the databasevar1– Name of the variable declared at the workbook level
- After entering all the SQL statements, click Save.
The SQL code is saved. - Run the algorithm flow for the RubiSQL Refer to Running a Workbook.
The RubiSQL code is executed, and the values in the database are updated as per the code statements.
Table of Contents


