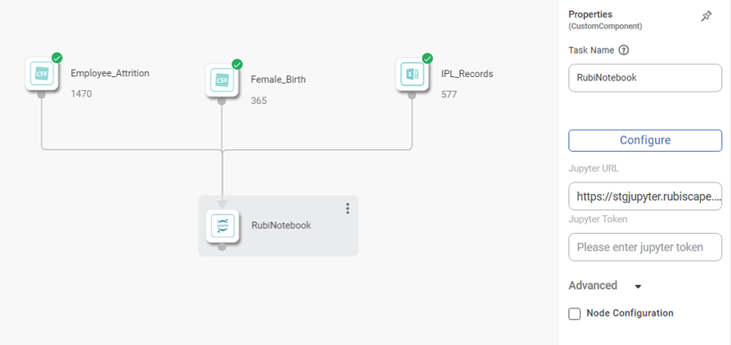
For reading the multiple datasets using RubiNotebook, follow the steps given below.
- Create a workbook. Refer to Creating a Workbook.
- Drag and drop the required datasets from the 'Reader section' in the Feature Studio. For example, we select the Employee Attrition, Female Birth, and IPL Records datasets.
- Run the datasets.
- Drag and drop the RubiNotebook from the 'Pro Code' section under the Model Studio in the Feature Studio.
- Select RubiNotebook and in the Properties pane, enter the Jupyter URL and then click Configure.
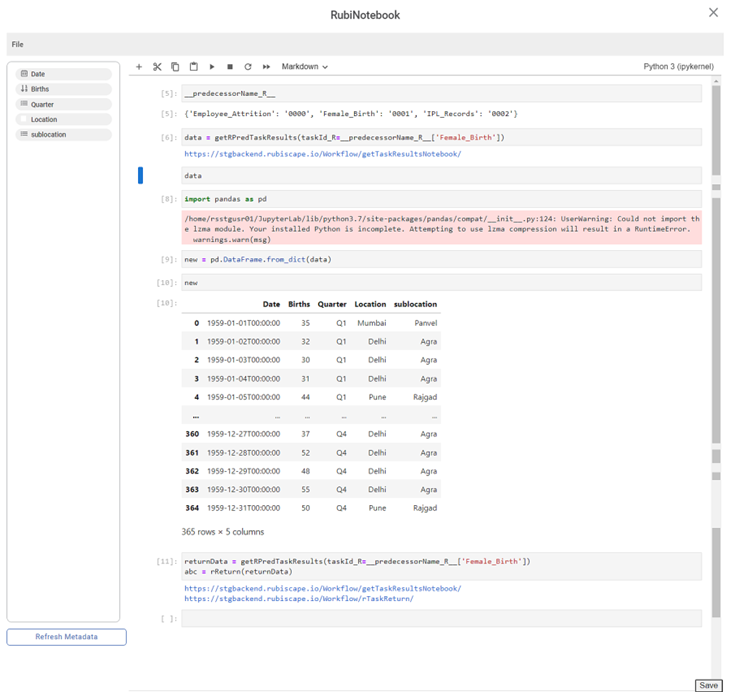
- Consider the following code
Code
Description
_predecessorName_R_
It displays the predecessor name connected to the RubiNotebook.
data = getRPredTaskResults(taskId_R=_predecessorName_R_['Female_Birth'])
Enter the task name to access the predecessor.
data
Prints the data as data dictionary.
import pandas as pd
Prompt to display the data in data frame
new = pd.DataFrame.from_dict(data)
We save the framed data as new.
new
Prints new result.
returnData = getRPredTaskResults(taskId_R=_predecessorName_R_['Female_Birth'])
]]></ac:plain-text-body></ac:structured-macro>
abc = rReturn(returnData)It stores the metadata and results of RubiNotebook tasks.
Shows all the available columns in the left side pane. Click on the Save button.
Notes- The RubiNotebook allows you to connect multiple datasets; only one can be accessed at a time.
- To Run the RubiNotebook, Save the workbook and explore the RubiNotebook node.

