Understanding Groups
A group in RubiThings is to organize your things dynamically into logical groups by tagging them.
Adding a Group
You can add a group by
- Clicking Groups in the Manage dropdown (for the first time)
- Clicking Create Group on the top-right corner of the Groups page (after you have added a group)
- Clicking Create Group from the Create () menu present on the title pane.
To add a group,
- Click Groups in the Manage dropdown. A Groups page is displayed.
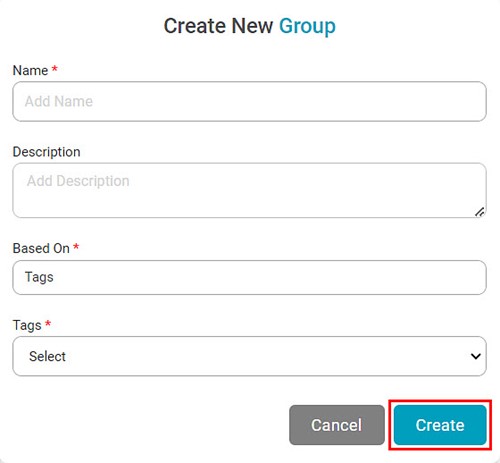
- Click Create Group () on the top-right corner of the Groups A Create New Group page is displayed.
- Enter a suitable Name for the Group. This field is mandatory.
- Enter a suitable Description for the Group.
- By default, Tags option is selected in Based On.
- From the Tags dropdown, select the tags for the Group. This field is mandatory.
- Click Create.
The Group is created and added to the list on the Groups
Searching Group
Searching for a group from a long list can be time-consuming. The Search field helps to search for your desired group quickly.
To search for a group,
- In the Manage dropdown, click Groups.
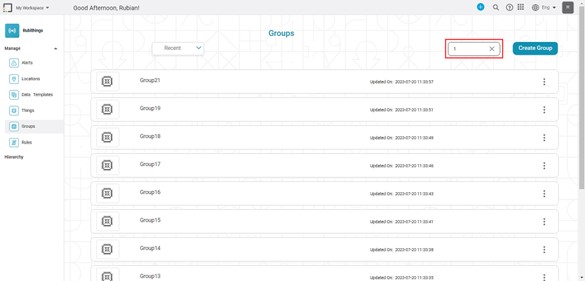
- Type the name of the group you want to search.
Partial names are allowed for searching. A list of group names matching the search string is populated as you start typing.
For example, in the image below, as we type the "1," the template results with the same string are populated on the dashboard.
Sorting Groups
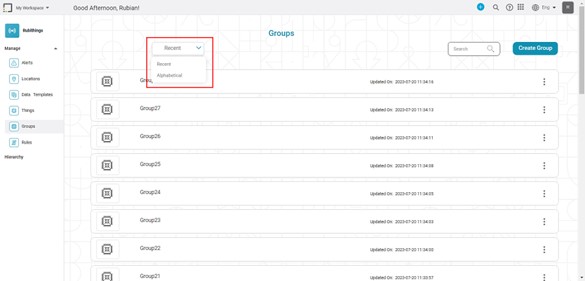
The Groups are sorted by the date and time they were created, with the most recent group appearing first. You can also sort groups according to alphabetical order.
To sort groups,
- In the Manage dropdown, click Groups.
- Click Recent near the top-right corner.
- Select Alphabetical. The list is sorted in alphabetical order.
Editing Group
To edit a group,
- In the Manage dropdown on the home page, click Groups.
- Identify the group you want to edit.
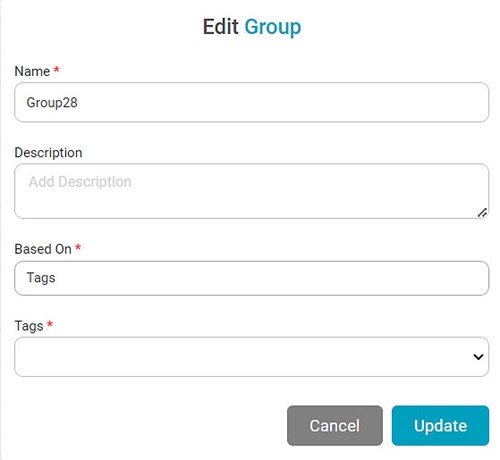
- To navigate to the Edit Group page, hover over the group and click the Edit icon (). Alternately, you can click on the group and then click the Edit icon () on the next page.
- On the Edit Group page, make the necessary changes to the various fields.
- Click Update. Your group is saved with the updated information.
Deleting Group
You can delete a group that is no longer required.
To delete a group,
- In the Manage dropdown on the home page, click Groups.
- Identify the group you want to delete.
- Hover over the group and click the Delete icon ( ). A confirmation message to delete the Thing pops up.
- Click Delete on the message. The group is deleted, and a confirmation message is displayed.
Table of Contents


