Face verification is the task of comparing a face image with another and verifying whether the two images match. The mapping is usually one-to-one. Face verification is different from face detection. In face detection, the model identifies the presence of a human or human-like face in an image without identifying the person.
In Rubiscape,, before face verification, face detection is carried out. Using the pre-built models, the face detection step detects all the faces in an image. Then, in the Face Verification step, the Source Image (also called the Input Image) and the Target Image are compared to determine whether they are the same or different.
| The Source and Target Images should not be the same. It means that the same file should not be used as the source and target image since verifying a person's identity from two same images would make no sense. |
Models and Parameters used in Face Verification
There are several pre-trained models and other parameters required for face verification. Also, face verification is preceded by face detection. Listed below are the models and parameters used in Rubiscape for face verification.
For Face Detection,
- MTCNN (Multi-task Cascaded Convolutional Neural Networks)
- Retina Face (default)
For Face Verification,
- Arc Face (default)
- VGG-Face
- Facenet
- Facenet512
- OpenFace
- DeepFace
Also, we select a distance metric learning method from the following list of Distance Metrics.
- Cosine Similarity (default)
- Euclidean Distance
- Euclidean_l2
|
|
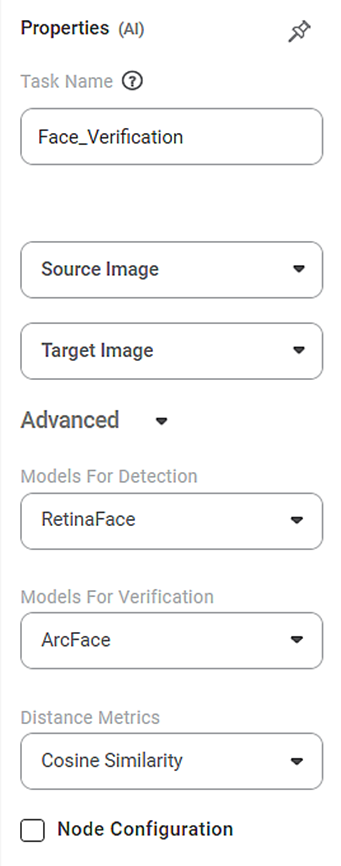
The available properties of Face Verification are as shown in the figure below.
Using the Properties pane, you can select
- A suitable name for the task
- The Source Image
- The Target Image
- The Model for Detection is the pre-trained model for Face Detection
- The Model for Verification is the pre-trained model for Face Verification
- The Distance Metric is the metric to calculate the similarity between data points.
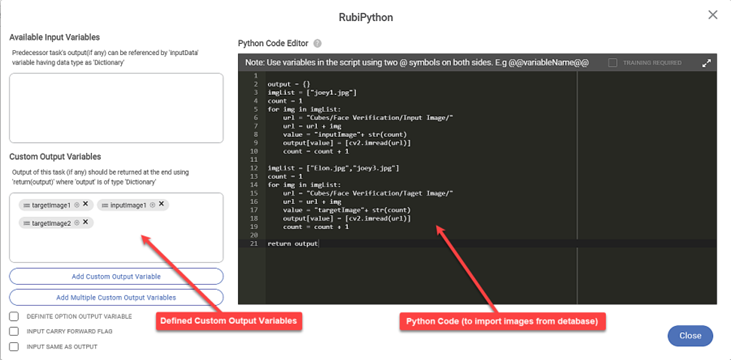
In addition, we write a code in RubiPython to
- Create Custom Output Variables corresponding to the images used for analysis
- Call the images from the database for analysis
A sample code in RubiPython is shown below.
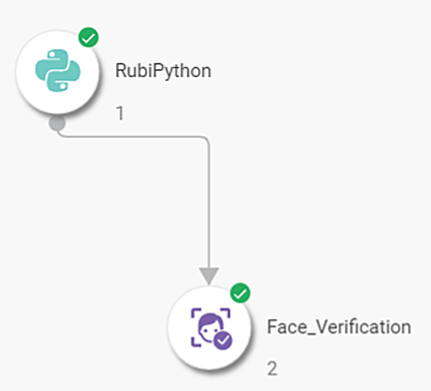
A typical algorithm flow for Face Verification looks like the one shown below.
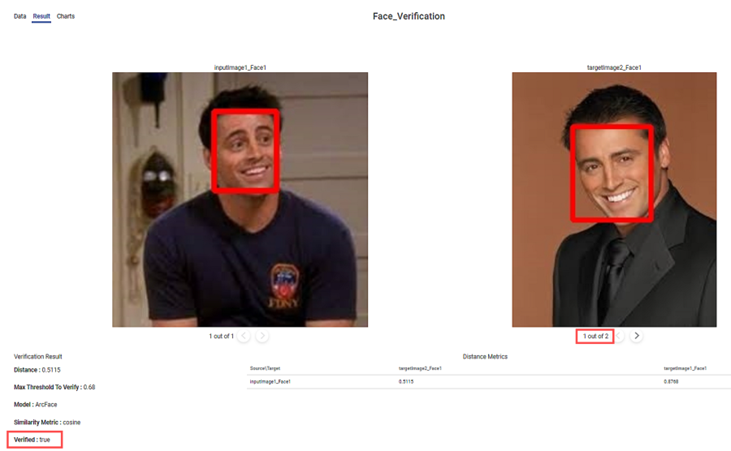
On exploring the Face Verification node, you see the results of the face verification analysis of the source and target images by the selected model.
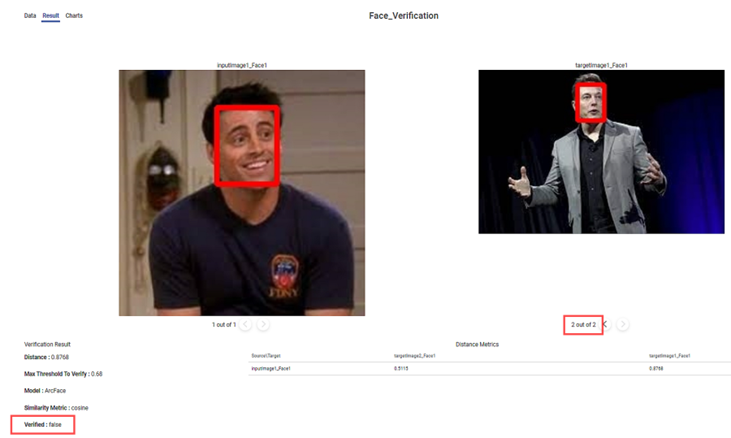
For the images above,
- The highlighted faces indicate that they are successfully detected.
- Maximum Threshold To Verify = 0.68
- Model: ArcFace
- Similarity Metric = cosine
The image below shows the results of face verification analysis for the given pair of images, that is, inputImage1_Face1 and targetImage2_Face1.
The results indicate that.
- Distance = 0.5115 and
- Verified = true
- The distance is less than the threshold, which means that the model successfully verifies that the two faces belong to the same person.
The image below shows the results of face verification analysis for a different pair of images, that is, inputImage1_Face1 and targetImage1_Face1.
The results indicate that,
- Distance = 0.8768 and
- Verified = false
- The distance is more than the threshold, which means that the model successfully verifies that the two faces do not belong to the same person.
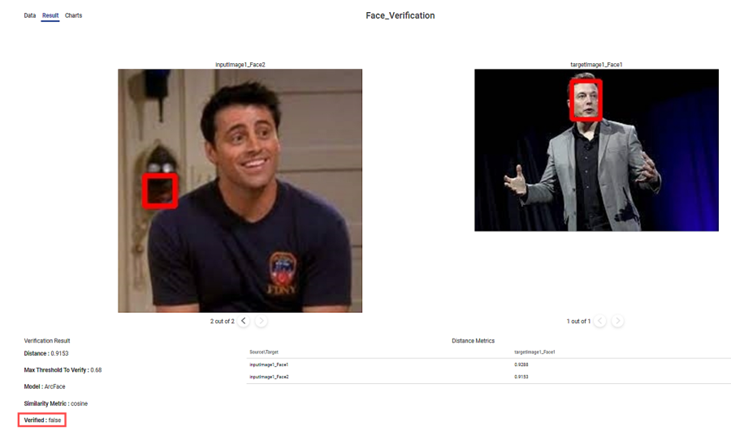
An interesting case of face verification is given below. Here, the face detection model detects a face-like structure of a wall hanging (in reality). Then the face verification model compares it with the target image.
The results indicate that,
- Distance = 0.9153 and
- Verified = false
- The distance is more than the threshold (maximum among the three cases) which means that the model successfully verifies that the two faces do not belong to the same person.
