Filtering | |||
Description | Filtering of numerical or textual, or categorical data based on provided filtering expression. | ||
Why to use | To filter out certain values from a dataset – Data Preparation | ||
When to use | When you want to use a subset of the dataset which satisfies certain conditions. | When not to use | |
Prerequisites | It should be used on numerical and categorical data. | ||
Input | Any dataset that contains categorical as well as numerical data. | Output | A subset of the input dataset filtered as per the expression used. |
Statistical Methods used | — | Limitations | — |
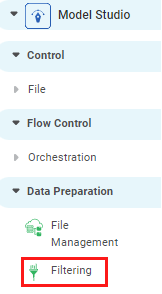
Filtering is located under Model Studio ( ) in the Data Preparation, in the task pane on the left. Use the drag-and-drop method to use the algorithm in the canvas. Click the algorithm to view and select different properties for analysis.
Refer to the Properties of Filtering.
In the Filtering algorithm, you can filter the given data based on certain conditions. The output is a subset of the original dataset.
Properties of Filtering
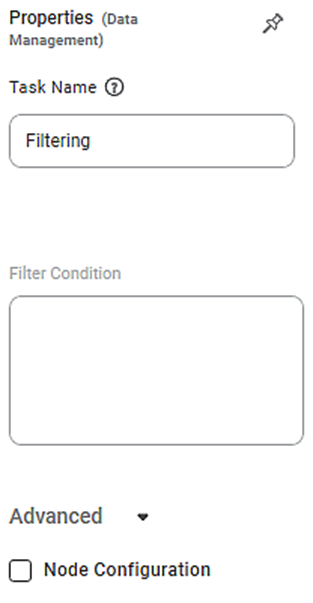
The available properties of Filtering are as shown in the figure given below.
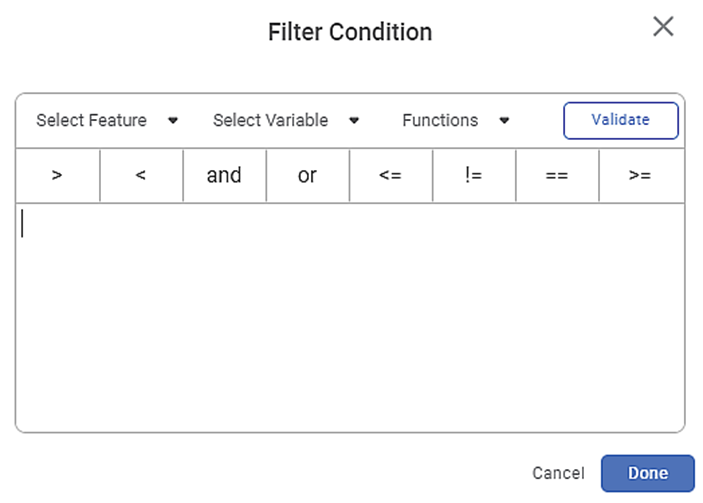
To see the available filters, click on the Filter Condition box. The Filter Condition dialog box is displayed as shown in the figure below.
The table given below describes different fields present on properties of Filter Condition.
Field | Description | Remark |
|---|---|---|
Select Feature | It allows you to select the features (columns) to filter the data. | Multiple columns can be selected and combined using conjunction operators. |
Select Variable | It allows you to select the variables created. |
|
Functions | It allows you to select the filtering functions to select the data. | For details, check the Filter Functions. |
Validate | It allows you to validate your filtering function before applying it to the features. It saves you time in case of incorrect expressions. |
|
Conditional Statements | They allow you to select the relational conditions to be applied to your features. | For details, check the Conditional Operators. |
Filter Functions
The filter functions help to apply filter conditions to the selected features.
Syntax Type 1: [Feature].filter function(values)
Example: [width].between(55,65)
Where, width = one of the features of the dataset
Syntax Type 2: @@Variable@@.filter function(values)
Example: @@Malic Acid >= 15
where, Malic Acid = one of the created variables
Figure 4: Filter Functions
The description of available functions is given in the table below.
Function | Syntax | Example |
|---|---|---|
Between | [Feature].between(start, end) It selects the data values that lie between start and end. | [Age].between(25,55) It selects only those data values in which the Age lies between 25 and 55 and filter out all other values. |
In_List | [Feature].Isin([value_1, value_2,.. value_n]) It selects all the data values in the provided list. | [Age].isin([20,30,50]) It selects only those data values where Age is either 20, 30, or 50. |
Not_In_List | [Feature].notin([value_1, value_2,.. value_n]) It selects all the data values except the provided list. | [Age].notin([20,30,50]) It selects all data values in which Age is not 20, 30, or 50. |
Is_Null | [Feature].Isnull() It selects all data values which are Null. | [Age].isnull() It selects data values in which Age is Nullnull. |
Not_Null | [Feature].notnull() It selects all data values which are Not Null. | [Age].notnull() It selects data values in which Age is not Nullnull. |
Conditional Operators
They allow you to define the conditions to be applied to your features. They can be used only for Numeric numeric data types.
The available conditional operators are shown in the figure below.
The description of the conditional operators is given in the table below.
Operator | Syntax & Description | Example |
|---|---|---|
> | [Feature] > value It selects data values where the value of Feature is greater than the value. | [Age] > 35 It selects the data values where Age is greater than 35. |
< | [Feature] < value It selects data values where the value of Feature is less than the value. | [Age] < 50 It selects the data where Age is less than 50. |
and | Expression1 and Expression2 | [Age] > 35 and [Education] > 12 It selects the data where Age is greater than 35 and Education is less than 12. |
or | Expression1 or Expression2 It selects a data value where either Expression1 or Expression2 is True. | [Age] > 35 or [Education] > 12 It selects the data where Age is either greater than 35 or Education is greater than 12. |
<= | [Feature] <= value It selects data values where the value of Feature is less than or equal to value. | [Age] <= 50 It selects the data where Age is less than or equal to 50. |
!= | [Feature] != value It selects data values where the value of Feature is not equal to value. | [Age] != 25 It selects the data where Age is not equal to 25. |
== | [Feature] == value It selects data values where the value of Feature is equal to value. | [Age] == 45 It selects the data where Age is equal to 45. |
>= | [Feature] >= value It selects data values where the value of Feature is greater than or equal to the value. | [Age] >= 16 It selects the data where Age is greater than or equal to 16 |
Usage of Filtering with Features
To create a filter using Features, follow the steps given below.
- Select a feature from the Select Feature dropdown.
- Select a function from the Functions dropdown. Alternatively, you can select one of the Conditional Operators.
- Enter a value to complete the filtering expression.
- To check whether your expression is valid or not, click Validate.
Example of Filtering with Features
Let us consider a sales dataset with 21000 rows. It contains different product types. A snippet of the input data is shown in the figure below.
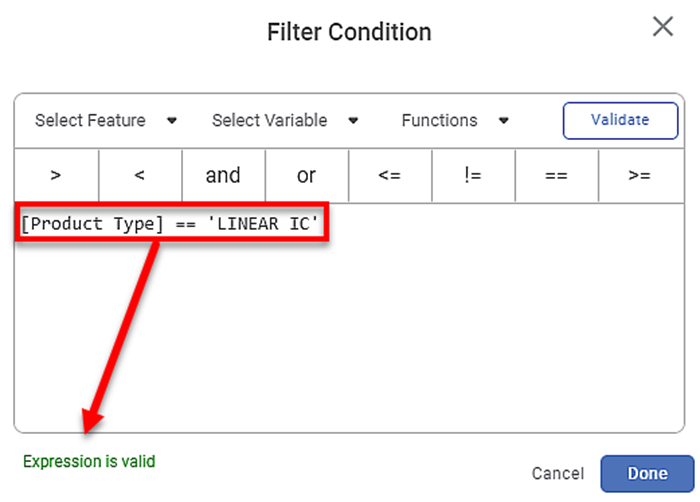
From this, let's extract data values in which Product Type is equal to Linear IC. For this, we apply a filter, as shown in the figure below.
A snippet of the resulting data is displayed in the figure below. You see that the data points with the selected filtering condition are retained in the dataset.
Usage of Filtering with Variable
To use the Select Variable option in the Filter Condition, create a variable using the Manage Variable option. For this, refer to the Defining Your Own Variables section in the Rubiscape User Guide.
For example, let's add Variable01 with default and current values 0 and Linear IC, respectively.
When you add a variable, the filtering condition considers the Current Value of the added variable for filtering purposes.
To create a filter using Variables, follow the steps given below.
- Select a feature from the Select Feature dropdown.
- Select a function from the Functions dropdown. Alternatively, you can select one of the Conditional Operators.
- Select a variable from the Select Variable drop-down. When you select the variable, the variable's name appears enclosed between a pair of "@@" symbols.
- To check whether your expression is valid or not, click Validate.
Example of Filtering with Variables
Let us consider a sales dataset with 21000 rows. It contains different product types. A snippet of the input data is shown in the figure below.
A snippet of the input data is shown in the figure below.
On this data, we apply a filter, as shown in the figure below. The Product type is equal to the current value of Variable01 (which is Linear IC).
A snippet of the resultant data is displayed in the figure below.
Since the Current Value of Variable01 is Linear IC, you see that the data points with product type equal to Linear IC are retained in the dataset.
|
|
Table of Contents


