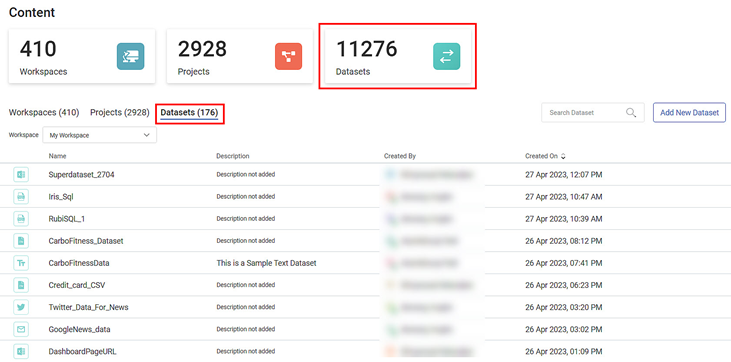
You can access your Tenant's Workspaces, Projects, and Datasets in the content space. The three clickable Content KPI Cards for Workspaces, Projects, and Datasets take you to the respective tabs on the Content Page.
Dataset
A dataset is a compilation or collection of data, usually in tabular form. However, non-tabular datasets can also be compiled, as in the case of an XML file, where data appears in the form of marked-up strings of characters.
In the case of Datasets, you can
Search, Add, Edit, Export, and Delete a Dataset
Add Users and Groups to the Dataset
Edit Access Control of the Dataset
Notes: |
|
The image below shows the contents below the Datasets tab.
The following table explains various fields on the Datasets tab.
Field/Icon | Description |
|---|---|
Datasets KPI Card
| |
Datasets (Number) | Projects List Tab
|
Workspace Drop-down | Select a workspace whose datasets you want to see in the list. |
Search Dataset |
|
Add New Dataset |
|
Menu Icon
|
RubiConnect
RubiConnect is one of the first products you come across on the Rubiscape platform. It provides seamless, direct, and secure access to multiple data sources with native interfaces and integration standards to source data. No custom coding or expertise in SQL or other query languages is required.
RubiConnect is tightly integrated and used by all Rubiscape solutions for third-party data integration. It helps build enormous reservoirs for big data and wants to deep dive into diverse data to come out with innovation and insights.
RubiConnect is needed for
Connectivity Gateway
Data & Workflow Designs
Data Integration
Metadata Management
Alerts & Rule Engines
The supported integration standards in RubiConnect include
ODBC
JDBC and
OLE DB
| Users can create datasets from RubiConnect page. The created datasets get added to the respective workspace selected in the dropdown. |
Types of Datasets
In machine learning, data variables are mostly categorized into the following types.
Numerical Data | Categorical Data | Interval data | Textual Data | Geographical Data |
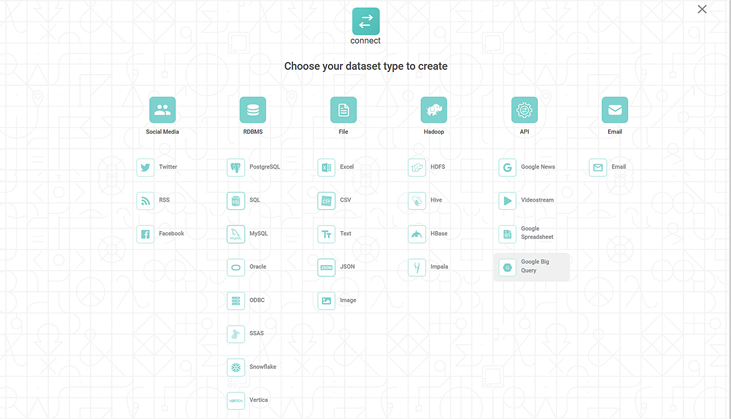
The data types and corresponding datasets supported in Rubiscape are given below.
Data Types | Datasets |
|---|---|
Social media |
|
Hadoop |
|
RDBMS |
|
API |
|
File |
|
As shown above, Rubiscape supports various data sources under each dataset type.
Adding a New Dataset
Datasets are created at the workspace level and hence are consumed in any of the entities in any of the projects in the Rubiscape module.
To add a dataset,
In the Dataset tab, select the Workspace to which you want to add the Dataset.
Click Add New Dataset on the extreme right. You are navigated to the RubiConnect page for dataset selection.
From the available options, select and click the required dataset type. A window to create the Dataset is displayed.
Fill in the required details. Refer to Dataset Cookbook for all types of datasets. After creating the Dataset, you are navigated back to the Dataset tab on the Admin Module's Content page.
Searching a Dataset
Searching a dataset from a long list can be time-consuming. The Search Dataset field helps to search your desired Dataset quickly.
To search a Dataset,
In the Dataset tab, click inside the Search Dataset field.
Type the name of the project you want to search.
Partial names are allowed for searching. A list of project names matching the search string is populated as you start typing.
Editing a Dataset
After you add a dataset, you can edit it.
To edit a dataset,
Hover over the Dataset you want to edit,
Click anywhere on the highlighted row and click Edit Dataset on the next page.
Click on the menu icon () and click Edit.
You are navigated to the Update Dataset page.
Make changes to various fields as required.
Click Update. The updated Dataset appears in the datasets list on the Contents page.
Adding Users and Groups To Dataset
As an administrator, you can add users and groups to access a dataset. You can identify a user or a group from their icons.
User | |
Group |
To add a user or a group,
In the Dataset tab, search and navigate to the required Workspace.
Search and navigate to the Dataset to which you want to add users and groups.
Click anywhere on the highlighted row and click Edit Dataset on the next page. Alternatively, click on the menu icon () and click Edit Access Control.
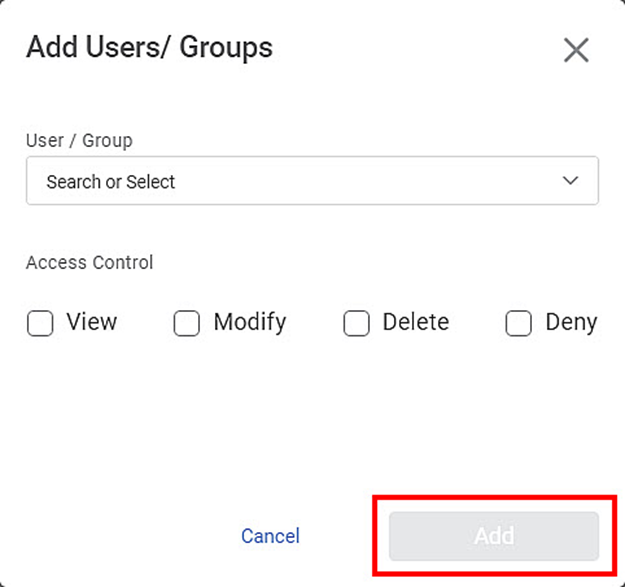
Click Add Users/Groups on the extreme right in the Access Control section. The Add Users/Groups page is displayed.
Click the Search/Select drop-down.
To select the users and groups,
Scroll down the list and add users or groups as required by selecting the corresponding checkboxes or
Type the names of users or groups you want to select in the search field or
Select the Select All check box for all users and groups.
After you have selected the required users and groups, click Add. The added users and groups list is displayed in the Access Control section.
Click Save in the top-right corner. The selected users and groups are added to the Dataset.
Providing Access to Dataset
As an administrator, you can control a user's (or group's) access to a dataset. You can give access to modify, view, and delete a dataset. Also, you can deny any of these accesses to users or groups.
Access | Users/Groups can | Additionally, Users/Groups can |
|---|---|---|
View | Only view a dataset | – |
Modify | Modify a dataset | View a dataset |
Delete | Delete a dataset | View and Modify a dataset |
Deny | NOT modify, view, or delete a dataset | – |
To provide access,
Follow steps 1 to 6 in Adding Users and Groups To Dataset.
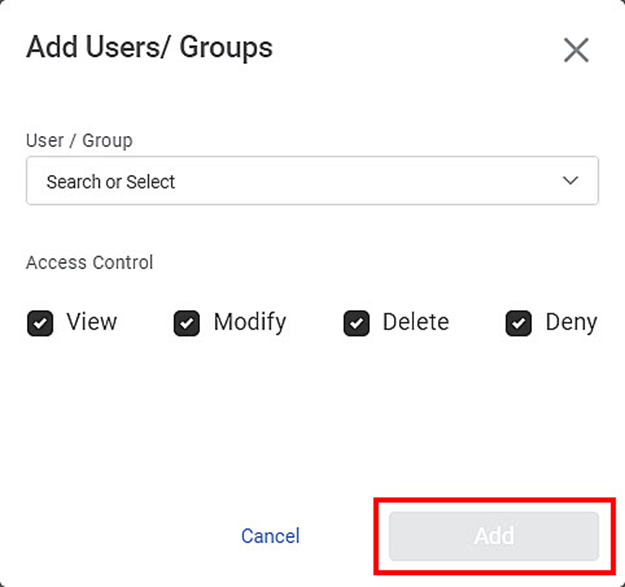
Select the access permission checkboxes for the controls you want to provide.
- Alternatively, to provide identical access controls to all the selected users and groups, select the access permission checkboxes directly on the Add Users/Groups page.
- Click Save in the top-right corner. The access controls are applied to the selected users and groups.
| In the Access Control section, you can identify a
|
Removing Access Control For Dataset
As an administrator, you can control a user's or group's access to a dataset. You can remove the access to modify, view, and delete a dataset.
To remove access,
In the Dataset tab, select the Workspace to which your Dataset belongs.
Search and navigate to the required Dataset.
Click anywhere on the highlighted row and click Edit Access Control on the next page. Alternatively, click on the menu icon () and click Edit Access Control.
As required, in the Access Control section, clear the checkboxes for Modify, View, and Delete options for the user/group. The individual user's or group's access permissions are removed.
If you want to remove a user or group from the list, hover over the user/group and click the Delete icon () on the extreme right.
Click Save in the top-right corner. The modified selections are saved for the Dataset.
Exporting a Dataset
You can export the Dataset to save it in your system. You can use the exported Dataset again by importing it into Rubiscape.
To export a dataset,
In the Dataset tab, select the Workspace to which your project belongs.
Search and navigate to the required Dataset.
Tip |
|
Deleting A Dataset
As an administrator, you can delete a project that is no longer required.
To delete a project,
In the Dataset tab, select the Workspace to which your Dataset belongs.
Search and navigate to the required Dataset.
Hover over the Dataset you want to delete, click on the menu icon () and click Delete. A confirmation message to delete the Dataset pops up.
Click Delete on the message. The Dataset is deleted, and a confirmation message is displayed.
Table of Contents


